
The last time I used oven-bake clay I was probably in primary school. However, I’ve noticed it popping up all over the joint, especially in the form of jewellery at craft markets. Now, the thing with craft markets is that half the stuff you see and think “I could make that myself”. But 99% of the time you never do. When I passed a stand of oven-bake clay on a Spotlight run the other day, I couldn’t help but pick up a few packets so I could finally get around to creating my own colourful clay jewellery. Note to self: go back and buy the glow in the dark clay.

What you’ll need:
– Oven bake clay (I used Sculpey but you could also use Fimo)
– Skewers
– Jewellery string
– Scissors
– Knife/something to cut the clay with
– Oven

Cut the clay into even sized blocks so you get beads that will be roughly the same size.

Sculpt them into your desired shape. I opted for round beads (and then flat buttons on my second batch). I started with the silver clay first and noticed that the darker colour and shimmer would transfer from my hands onto the lighter clay. I might suggest working with the lightest colours first, moving in order of darkness. That, or keep washing your hands between colours.

Using a skewer, poke holes through the beads so that you’ll have something to thread your jewellery string through. I made sure to insert the skewer from both ends to get the nicest finish.

Place the beads on a baking tray and put them in the oven, following the instructions on your particular packet of clay. Mine suggested 15 minutes per 6mm of clay at 130 degrees celsius. However, taking into account my oven’s propensity for burning anything and everything, I turned it down to 100 degrees and baked them for 12 minutes, making sure to check constantly so they didn’t burn. I put mine on skewers since I didn’t want them to roll around or flatten out on the tray. I don’t think it makes much of a difference either way though.

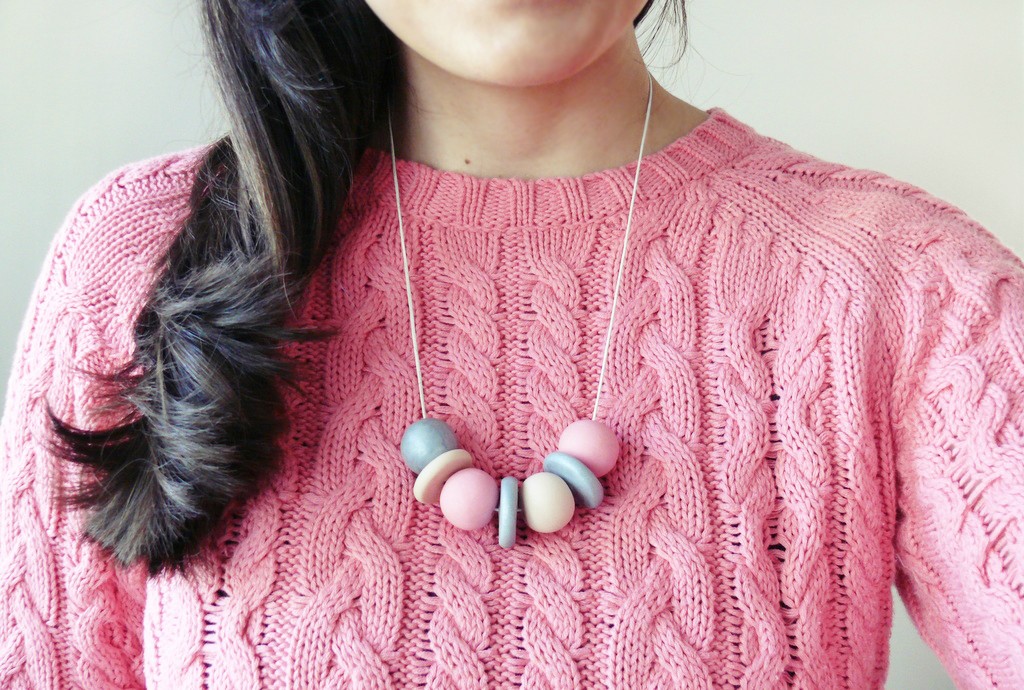
After letting your clay beads completely cool, cut the jewellery string to your desired length, leaving a bit extra. Then thread your beads on in the order of your choosing. If you knew a thing or two about jewellery making (I don’t) then you could add a hook and clasp to the end of your necklace but I did the lazy thing and tied a knot instead.

I stuck with a fairly simple design, but you could seriously go nuts making all different shaped beads. The whole process is fairly straightforward (I didn’t really need to do a whole post on it but, you know, #content) and it’s a project you can easily complete in a crafternoon.
It looks lovely! The colours go so well with your jumper 🙂
fun! I've made something similar a while back (but it has since broke! wahh!)
I love your colour combo.
I love the colours. Tempted to do a bit of crafting now.
love the colours!
This is such a cute little project! I've always been keen on experimenting with clay, but now I think I'll have to actually try this out for myself.
I absolutely love the colours you used and the design is awesome! <3
Jennie xo | sailorjennie.com
Hey pretty girl!I also love your blog, lots of inspiration! Cool design! Hope you can check out my blog too! It means the world to me! Kisses from Poland 🙂
http://voguerka.blogspot.com
http://facebook.com/voguerka
This is such a lovely idea! I love the colours. xo
Soph this is gorgeous! i really like the simple design and the use of fun colours. Wish I was this creative 😉
Love the colors!
http://www.littlereedbook-thatshaute.blogspot.com
You did so well I am always too lazy too DiY but definitely looks worth the effort!
This looks fab! Such lovely colours too. Just stumbled across your blog, now following lovely!
Louise x
The Little Things
This looks amazing and looks so simple to do 🙂 xo
the result is brilliant, very pin-worthy indeed. some of my mates would like this.